0

‘Home sweet home’ garland

Here is a hanging garland I’ve made for our friends who have just moved into their first home together. I needed something that would post easily and add a little decoration to their unfurnished place. Just as luck would have it, I had a scrap of map fabric with ‘South America’ on it, which is perfect for this couple as they got engaged in Brazil! Its amazing how some things turn out! I’ll get it wrapped up and in the post ready to adorn their new home together.  


0

Tuesday tutorial: bunting 

So I missed out last weeks tutorial (oops!) but am back again now! In fact I actually took the photos for this ready to load up last week but never got round to it….

Bunting – perfect for summer parties, home decor and bringing a smile to anyone’s face. Plus, pretty easy to make and satisfying at the end of it! It can be completed in a couple of hours, is a great stash-buster and you can personalise and embellish it in a wide variety of ways.  

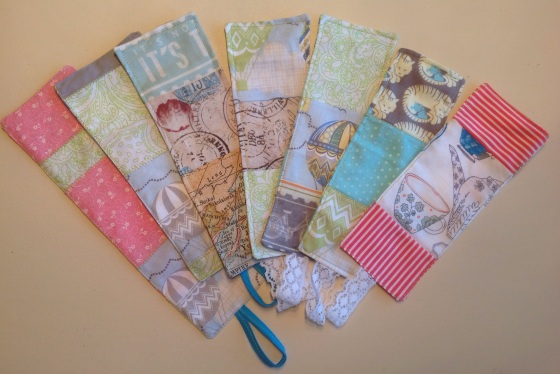
I chose to use some of my British and London inspired fabrics for this bunting. I lined the back of each flag with either red or navy.  

 Materials: fabric triangles (I use 6″ x 7″ but any size will work), binding, scissors, sewing machine, plus any extra embellishments you want to add, e.g. Buttons, lace, appliqués etc.

Step 1: cut out as many triangles as you want, remembering you need 2 per ‘flag’. Depending on the fabric, check that the pattern is the right way up.

Step 2: add any embellishments you want (I didn’t add any below)

Step 3: pin the front and back of 2 triangles together, right sides together.

Step 4: sew down the length of the 2 sides of the triangle. Leave the top open for turning.

Step 5: turn each flag the right way out and press with an iron. Be careful not to poke all the way through the point of your flag!

Step 6: assemble your flags into the order you want them – I tend to do this on the floor. 

Step 7: place the binding on the floor and work out the middle point. Measure a gap between each flag and pin each flag between the binding. Remember to leave enough binding at the end for tying. (I find using a scrap of fabric or card helps to keep the distance between each flag the same).

Step 8. starting at one end, sew the folded binding together and carefully sew each flag into the binding. You could use a decorative stitch for this (I used a zigzag stitch). 

Step 9: hang up, admire and enjoy!   


0

English Rosy Bunting

  Living in rental accommodation after having lived in your own home for years takes some adjustment, especially when you like to put your own (in my case, colourful!) stamp on a place. Therefore I am thinking of different ways I can add a bit of personality to our new home, and bunting is what I’ve gone for in the kitchen! 

We are lucky in that the house has been decorated in a modern style (not every wall is beige or magnolia! Horray!) but I still want to add some personal touches. The end wall in the kitchen is painted brown – it is probably called something trendy like ‘mocha’ – (it sounds worse than it looks, honest!) and so I really felt it needed brightening up. 

The fabric I used for this bunting caught my eye immediately; I bought it in a fabric store in Manchester that my cousin took me to when I visited her in April – everything was sold by the kilo! It worked out at about £5 a metre. I actually bought a metre of it to use as backing for a small quilt I will (eventually) make. I love the vivid pinks and reds in the roses and the subtle background of cream leaves to add depth to the print. It has a real English, vintage, summer, garden party feel about it, which I miss now I’m in Canada! 

When I cut the size of the quilt backing, I was left with a 6″ strip of fabric which I knew would be perfect for a small strip of bunting. I managed to squeeze 8 ‘mini’ flags from it, and used a peachy coloured fabric for the back of each flag, to maximise the number of rosy flags I could make. (For anyone interested, the width and height of each flag is 6″). As the fabric is actually upholstery fabric, it’s quite thick which made making the points quite tricky to turn out. They look fine from a distance! 

Unbelievelaby I didn’t measure the binding (it was all I had left from a strip I had bought a while ago) but the length couldn’t have been more perfect for the gap between the 2 windows! Phew! 

I just love bunting and think it gives a real summery feel to wherever it is used. I declare summer is officially here now (I’m ignoring the fact there was a snow blizzard here last night!) 😉

0

Orange and raisin cupcakes

Having bought a lot of oranges this week and in need of some sweet treats, I decided to make some cupcakes. I used the juice and zest from 2 oranges and then thought, why not add some raisins too! I adapted the recipe I use for cupcakes by substituting 1/4 pint of the milk with freshly squeezed orange juice. I also used orange juice in the icing and sprinkled the zest on top. I added slightly less sugar and baking powder than suggested due to the altitude; they have risen perfectly. Even the raisins haven’t all sunk to the bottom! 


The perfect combination with a cup of tea in my vintage ‘Royal Stafford’ tea cup! 

0

Bookmarks galore!

 I’ve had a bit of a crazy afternoon using up lots of scraps of fabric by making some bookmarks. I’m visiting lots of people over the next few weeks and thought these could be nice little Easter gifts for them. I haven’t added any interfacing, so they are quite flimsy, but being quite thin they don’t create any bulk in the books. Happy reading people!  

2

Bargain hunting here I come!

Today I am off to explore a new area of the city and am going to check out a large thrift store. Shopping in Canada is quite different to the UK! I usually have a few trusted friends who enjoy a trip to the charity shops, but today it’ll just have to be me! I’m looking for some vintage fabric, ideally I’d like some lace. The beauty of these stores is you never know what you’re going to find. Top of my list is also a coffee table but as I’m going on the train I think that will have to wait, plus I still have my table and chairs to finish! One project at a time…..!

So I’m back and you can see my collection of fabrics below. No vintage lace but a lace top that had never been worn and a selection of cotton off-cuts. I am planning on setting up an etsy store with foldable tote bags and tea cosies to sell, so I think I best make a start!

IMG_0265